


Articles
Dial in the Phases of the Snatch & Clean
July 30, 2018
July 30, 2018
Like any athletic action, the snatch should be executed as a single, fluid motion. But like most complex tasks, it helps to break it into more digestible segments both conceptually and for the purposes of motor learning. The following gives you the most important points to understand and master in each phase of the snatch, along with some links to more in-depth looks at the details if you’re so inclined. Note that each linked article has a number of other related articles linked to it, so the rabbit hole will go as deep as you want it to.
Starting Position
The starting position will vary in appearance and somewhat in actual positioning among athletes for reasons like proportions and mobility, but every lifter should be working from the same starting point:
First Pull
The first pull brings the bar from the floor to the point at which you initiate the final upward explosion (second pull), which should be above the knee to mid-thigh. This is primarily a positioning movement rather than an attempt to accelerate the bar maximally—the goal is to give the bar adequate speed to allow you a successful second pull while establishing the optimal position from which to do so.
Separate the bar from the floor with the legs—push like a squat. Keep the bar as close to the legs as possible without dragging, shift the weight very slightly farther back over the foot (not to the heel—mid-point between the balls of the foot and the heel), and keep the shoulders directly above or slightly in front of the bar by maintaining approximately the same back angle from the starting position.
Read more about it here
Second Pull
The second pull is the primary source of the upward acceleration of the bar that creates the elevation and momentum allowing you time and space to get under it. The goal is a coordinated explosive extension effort of the knees and hips, not a domination of one over the other.
Push through the entire foot to try to keep it flat on the platform as long as possible, and let the heel rise naturally with the final leg drive effort. Actively bring the bar toward the body as you extend to keep it as close to the legs as possible and finally into contact with the hips.
Even though the heel rises and the pressure shifts to the balls of the foot, your weight should remain balanced over the same point it’s been balanced since the lift was initiated. Continue actively guiding the bar up as close to the body as possible as you finish the extension.
Read more about it here
Third Pull
The third pull is the active relocation of your body under the bar into the receiving position. Read that again and understand it. You’re not falling or dropping under the bar. Continue pulling the bar upward with the arms, bringing the elbows up and out to the sides (the reason for the internal rotation you established in the starting position), and keeping the bar and body as close as possible, while lifting and repositioning your feet into your squat stance.
Plant the feet flat on the platform directly under the bar and attempt to complete the turnover at the same time (it won’t actually happen, but this will help your speed and aggression). In the snatch, punch straight up on the bar as you sit into the squat; in the clean, drive the elbows up and reach the chest and shoulders up to meet the bar as you sit into the squat. In both lifts, the goal is to maintain connection and meet the bar, and then immediately establish security of the bar and stability of your body.
Read more about it here
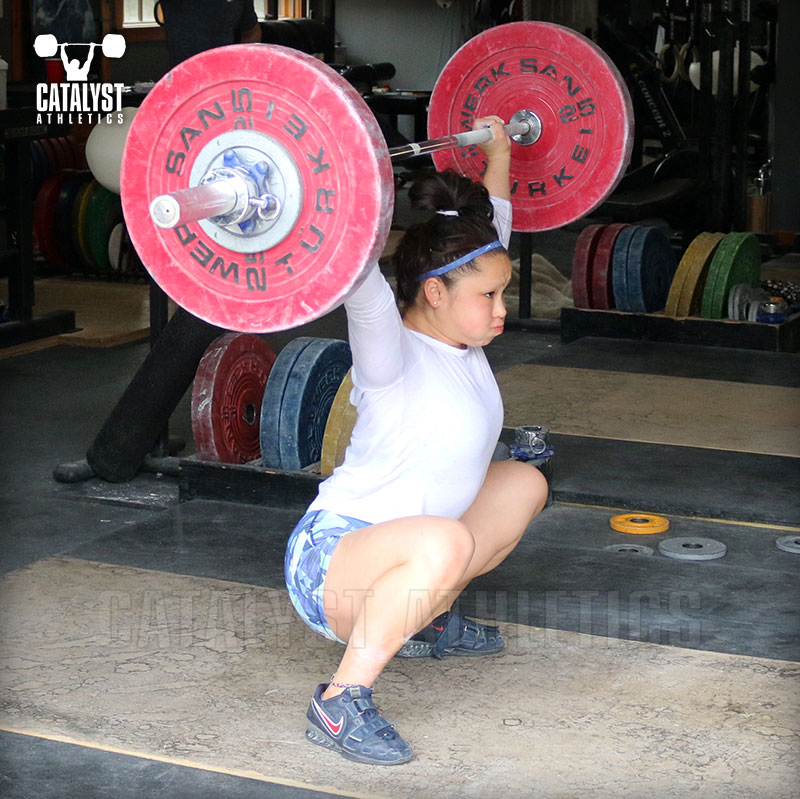
Receiving Position
The receiving position in both lifts is all about security of the bar and stability of the system. This means being as active and aggressive as you were in every other phase of the lift to this point. Lock the shoulder blades into position and push straight up on the bar, or keep your upper back and trunk locked in and reach the chest and elbows up, to maintain a solid bar position. Sit all the way into the bottom of the squat—this is where you’re most stable and where unwanted motion is naturally minimized.
Read more about it here
Recovery
In the snatch, the bar position is far more precarious than in the clean, and because of this, establishing bar security and stability takes priority over standing up quickly. If you’re completely confident you have control, by all means, bounce right out of the bottom. If not, settle into the squat and stabilize before attempting to stand. Push up on the bar and follow it with your body to help maintain stability and your ideal posture.
In the clean, because the weights are significantly greater than in the snatch, and because we need to preserve as much energy in the legs as possible for the subsequent jerk, we’re always attempting to catch the bounce and drive out of the squat as immediately and quickly as possible. Receiving the bar properly is critical—if you don’t, you’ll have to adjust in the bottom and lose the opportunity to use the elastic energy to help bring you out of the hole. In such a case, don’t attempt to simply stand from a dead stop in the bottom—create a few progressively larger bounces to get as much elastic energy as possible to help.
Read more about it here
Starting Position
The starting position will vary in appearance and somewhat in actual positioning among athletes for reasons like proportions and mobility, but every lifter should be working from the same starting point:
- Barbell over the balls of the foot
- Weight balanced across the whole foot
- Shins inclined forward to position knees above and possibly slightly in front of the bar
- Back arched completely and reinforced with air pressure and circumferential muscular tension
- Shoulder joint directly above or very slightly in front of the bar (arm approximately vertical when viewed from lifter’s side)
- Arms internally rotated (points of elbows oriented out to the sides)
- Shoulder blades depressed and neutral in terms of protraction/retraction
- Head up and eyes forward
First Pull
The first pull brings the bar from the floor to the point at which you initiate the final upward explosion (second pull), which should be above the knee to mid-thigh. This is primarily a positioning movement rather than an attempt to accelerate the bar maximally—the goal is to give the bar adequate speed to allow you a successful second pull while establishing the optimal position from which to do so.
Separate the bar from the floor with the legs—push like a squat. Keep the bar as close to the legs as possible without dragging, shift the weight very slightly farther back over the foot (not to the heel—mid-point between the balls of the foot and the heel), and keep the shoulders directly above or slightly in front of the bar by maintaining approximately the same back angle from the starting position.
Read more about it here
Second Pull
The second pull is the primary source of the upward acceleration of the bar that creates the elevation and momentum allowing you time and space to get under it. The goal is a coordinated explosive extension effort of the knees and hips, not a domination of one over the other.
Push through the entire foot to try to keep it flat on the platform as long as possible, and let the heel rise naturally with the final leg drive effort. Actively bring the bar toward the body as you extend to keep it as close to the legs as possible and finally into contact with the hips.
Even though the heel rises and the pressure shifts to the balls of the foot, your weight should remain balanced over the same point it’s been balanced since the lift was initiated. Continue actively guiding the bar up as close to the body as possible as you finish the extension.
Read more about it here
Third Pull
The third pull is the active relocation of your body under the bar into the receiving position. Read that again and understand it. You’re not falling or dropping under the bar. Continue pulling the bar upward with the arms, bringing the elbows up and out to the sides (the reason for the internal rotation you established in the starting position), and keeping the bar and body as close as possible, while lifting and repositioning your feet into your squat stance.
Plant the feet flat on the platform directly under the bar and attempt to complete the turnover at the same time (it won’t actually happen, but this will help your speed and aggression). In the snatch, punch straight up on the bar as you sit into the squat; in the clean, drive the elbows up and reach the chest and shoulders up to meet the bar as you sit into the squat. In both lifts, the goal is to maintain connection and meet the bar, and then immediately establish security of the bar and stability of your body.
Read more about it here
Receiving Position
The receiving position in both lifts is all about security of the bar and stability of the system. This means being as active and aggressive as you were in every other phase of the lift to this point. Lock the shoulder blades into position and push straight up on the bar, or keep your upper back and trunk locked in and reach the chest and elbows up, to maintain a solid bar position. Sit all the way into the bottom of the squat—this is where you’re most stable and where unwanted motion is naturally minimized.
Read more about it here
Recovery
In the snatch, the bar position is far more precarious than in the clean, and because of this, establishing bar security and stability takes priority over standing up quickly. If you’re completely confident you have control, by all means, bounce right out of the bottom. If not, settle into the squat and stabilize before attempting to stand. Push up on the bar and follow it with your body to help maintain stability and your ideal posture.
In the clean, because the weights are significantly greater than in the snatch, and because we need to preserve as much energy in the legs as possible for the subsequent jerk, we’re always attempting to catch the bounce and drive out of the squat as immediately and quickly as possible. Receiving the bar properly is critical—if you don’t, you’ll have to adjust in the bottom and lose the opportunity to use the elastic energy to help bring you out of the hole. In such a case, don’t attempt to simply stand from a dead stop in the bottom—create a few progressively larger bounces to get as much elastic energy as possible to help.
Read more about it here


