Articles
The Clean and Jerk Rack Positions
September 8 2014

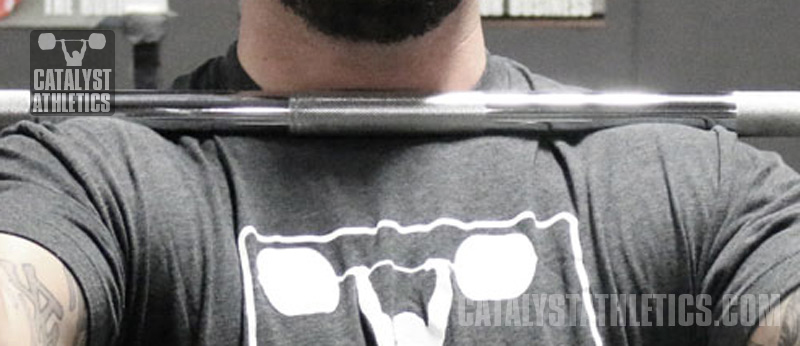
The bar should sit securely in the channel between the top of the shoulders and the throat
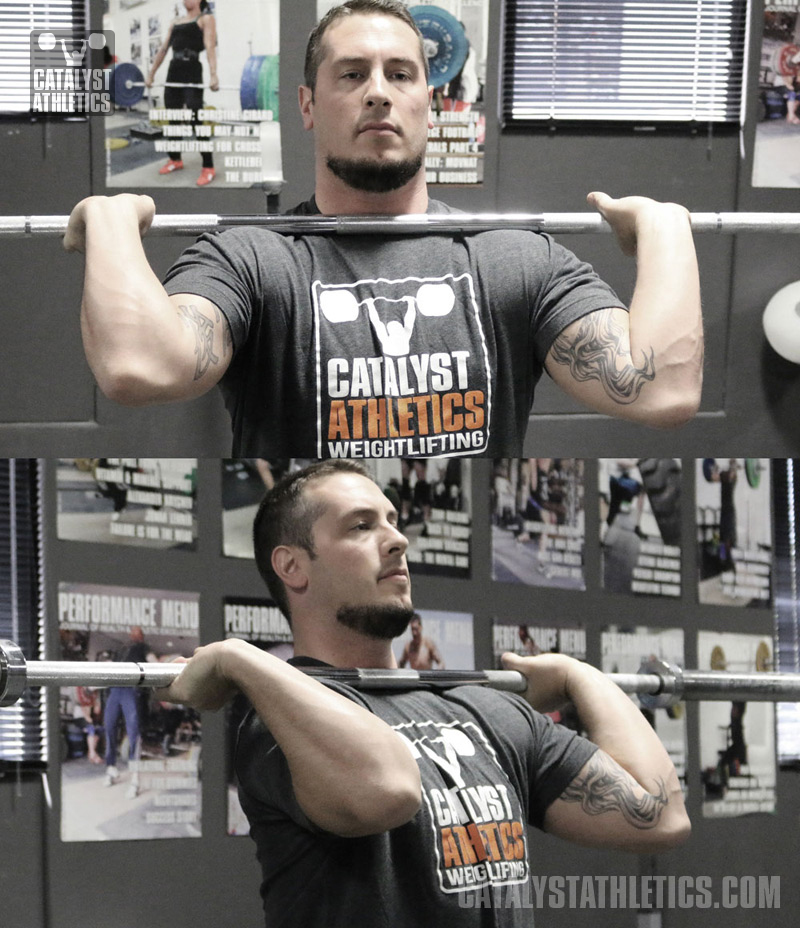
Clean rack position with full grip
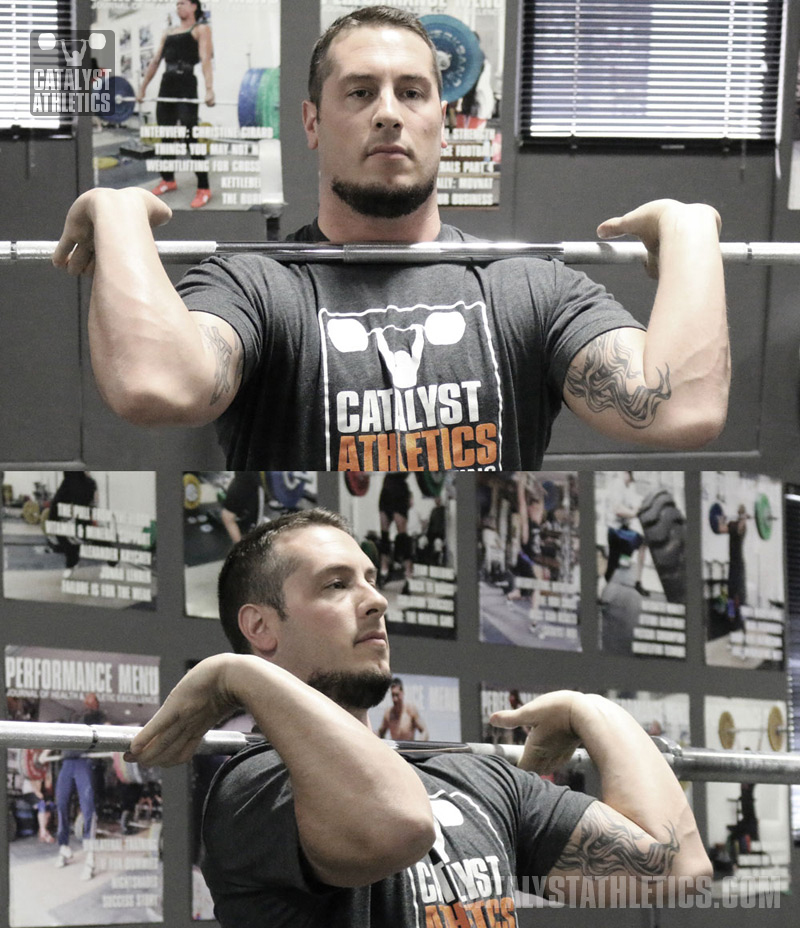
Clean rack position with open grip
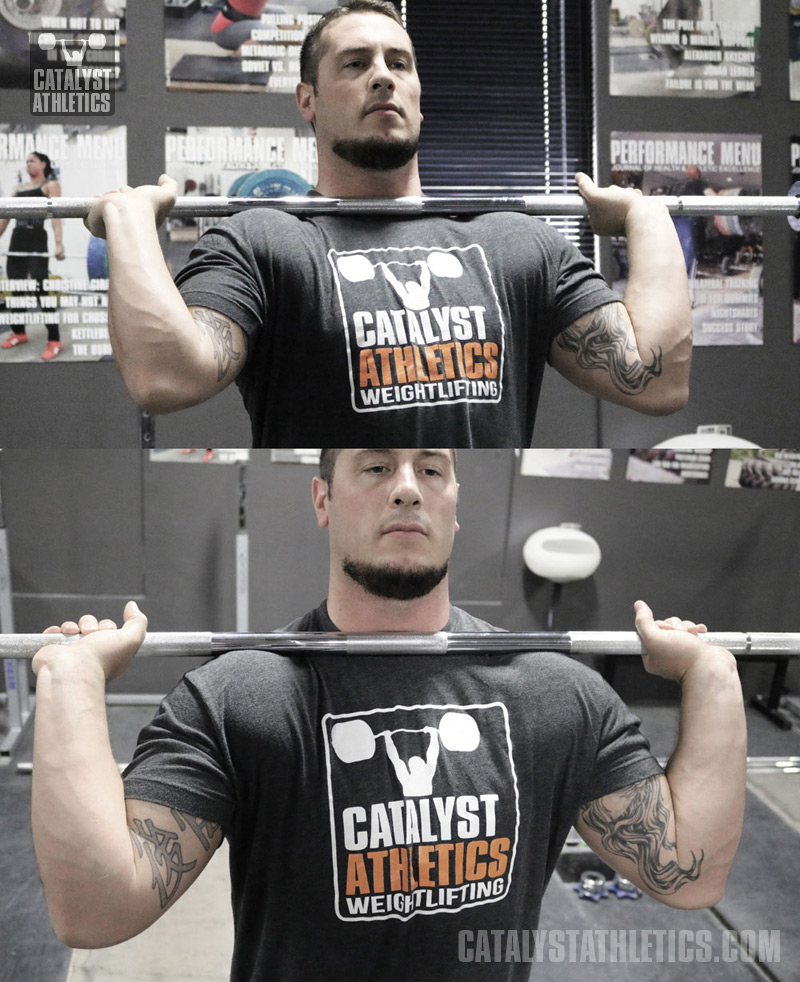
Jerk rack position with full grip
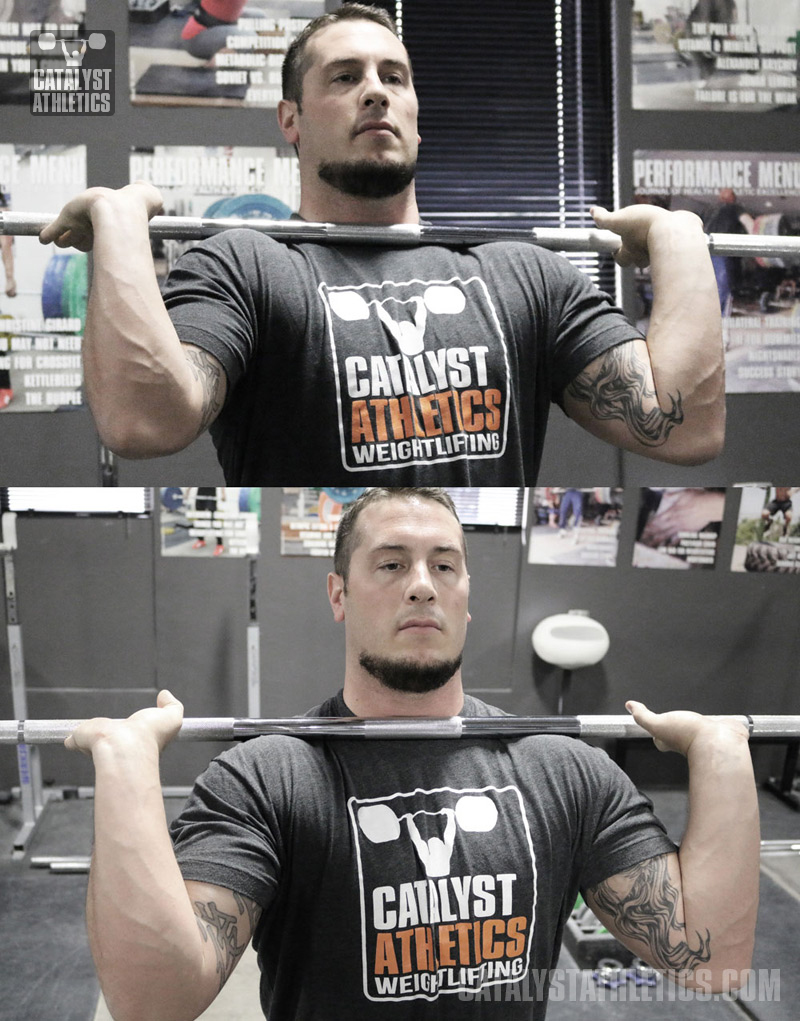
Jerk rack position with open grip
September 8 2014

Weightlifting has quite a few layers—you can learn the snatch and clean & jerk in a few minutes, but you can then spend a lifetime learning how to perform them better. It’s an odd combination of joy and frustration. There are countless minor details that collectively can make dramatic differences in lift performance—the rack positions for the clean and the jerk are perfect examples of this. The following are some of the more important of those details that should improve your lifts considerably with their implementation.
The first one is simply that you should use a different rack position for the jerk than you do for the clean. I think most people who frequent this site have figured this out already, but there are a lot who haven’t. Keep in mind that the difference may be quite minor depending particularly on the clean rack position, but I’ll explain that as we go.
Universal
A couple elements are the same for both rack positions, so I’ll cover them first. In both lifts, the barbell must be supported directly by the trunk—that is, the weight is connected directly to the lifter’s torso and the arms are not doing anything to directly hold the bar.
The shoulders need to be elevated slightly and protracted (shoulders pushed forward) typically as much as is possible. Understand that scapular position and the curve of the thoracic spine are not the same thing, although it’s natural to round the upper back when protracting the scapulae. However, this needs to be avoided. We want to maintain as straight and erect of a spinal position as possible to support the barbell over the hips and create a rigid piston out of the trunk.
The protraction and elevation of the shoulder blades creates a channel in which the bar can rest securely between the highest point of the shoulders and the throat. Don’t rest the bar on the top of your shoulders—it’s not secure and will easily slide down and forward as you dip or change directions at the bottom of the dip. This position of the bar should be secure with or without your hands being involved. It also places the bar farther forward of the spine—the farther forward it is, the greater the moment on the spine and hips, and consequently the harder it will be to maintain the upright position during the clean or jerk.
The slight elevation of the shoulders will do two simple but important things. First, it will keep the bar from actually resting on the collarbones—light contact is fine, but if you’re in the habit of resting the bar completely on the bones, you will experience an unnecessary amount of pain during the clean particularly, and over time will likely develop nearly permanent bruising above the bone and tissue build-up between the bone and skin, making the collarbones in effect higher profile and even more apt to be hit by the bar, further exacerbating the problem. Second, this elevation of the shoulders helps prevent the carotid arteries from being occluded—enough pressure on these arteries for only a couple seconds will put you to sleep. Add in the vasovagal response from holding your breath and exerting yourself as you’re likely doing during a tough clean recovery, and you have the perfect protocol for inducing unconsciousness.

The bar should sit securely in the channel between the top of the shoulders and the throat
The Clean Rack Position
The basics of this position are pretty simple: the purpose is to allow the trunk to support the barbell in the front squat securely and in a way that allows and encourages the correct upright posture and recovery from the squat.
The hands should be at least slightly outside the shoulders—the fingers shouldn’t be touching the shoulders, and definitely not caught between the bar and the shoulders. The actual width of the hands that works best will depend on how you’re built with regard primarily to the relative lengths of your upper and lower arm. Wider grips will sometimes allow lifters to achieve a better position and get more air to stabilize the trunk, but not always. You’ll need to experiment to find what grip width works best for you, and don’t forget to consider how that grip width affects the pull and turn over of the clean as well (for example, a wider grip will allow the bar to contact the body higher on the thighs and usually make for a quicker turnover).
Ideally the hands are wrapped around the bar with a full grip, albeit a relatively loose one. A very tight grip will nearly always cause the elbows and shoulders to drop, reducing the security of the rack position, and a tight grip will slow the final portion of the turnover of the clean. A full grip in the rack position, however, is physically impossible for many people due simply to their body structures. If the limitation is mobility rather than structure, this problem should be addressed. For those who are unable to maintain a full grip on the bar, whatever grip is used should be as close to it as possible. This may mean all fingers are around the bar, or it may mean only two or three. In any case, again, the shoulder position and the bar’s security in the channel between the shoulders and throat is the priority.
The elbows should be lifted as high as possible without changing the proper shoulder and barbell positions. To a point, elevating the elbows will help improve the position of the shoulders and the security of the bar, which is what we want (as well as to keep them safely clear of the knees when at the bottom of the squat). However, there are cases in which the attempt by certain individuals to raise the elbows maximally causes them to drop or pull back the shoulders, which then reduces the security of the rack position rather than enhancing it. In short, make the shoulder position the priority and support it with the elbow position, being careful not to compromise it.

Clean rack position with full grip

Clean rack position with open grip
The Jerk Rack Position
The basics of this position are slightly more complicated than the clean. We not only have to have the same direct support of the bar by the trunk, but additionally need to set up the hands and arms as optimally as possible for pushing ourselves under the bar after the drive—that is, we want to get as close to an optimal pressing position as we can without sacrificing the direct trunk support of the bar and its security in the rack position.
The first difference we’re likely to see is that of grip width. Many lifters use a different hand spacing for the jerk than they do for the clean (I would say the majority who do adjust jerk with at least a slightly wider grip than they clean with). This can be very subtle or very dramatic—it all depends on what works best for each lifter.
The grip on the bar should change as well to bring the hands around the bar as much as possible—that is, we want the bar as close to being in the palms as we can get it without sacrificing the support of the bar on the trunk, i.e. changing the shoulder position described previously. Again, no matter how full the grip is around the bar, it should be relatively loose—a tight grip can move the bar prematurely from the secure position on the shoulders, and it will also slow and possibly limit the extension of the elbows.
The elbows should be lowered and spread to the sides. The lower the elbows are without being directly under the bar (they should always remain at least slightly in front of the bar), the better the mechanics will be for pushing under the bar after its upward drive with the legs. Spreading the elbows to the sides will also help with the pressing mechanics, but also allow the lifter to better pressurize the trunk with air and create a strong position from which to drive the bar up.

Jerk rack position with full grip

Jerk rack position with open grip
Making the Adjustment
How much difference there is between your clean and jerk rack positions will generally dictate how dramatic the adjustment between the clean and jerk will need to be. Certain lifters are built such that they can move the hands and elbows into position for the jerk without moving the bar at all. This is unusual, however—most lifters will need to pop the bar up off of the shoulders momentarily to shift the hands into position.
This adjustment can be done after standing completely from the clean by using a little upward drive of the legs to unload the bar from the shoulders just enough to move the hands, but this is a waste of time and energy and should only be used as a last resort.
Instead, the lifter should use the upward momentum already generated by the recovery from the clean to drive the bar up off the shoulders to create space for the adjustment. That is, finish the clean recovery aggressively all the way to the full standing position so the bar jumps up off the shoulders a bit, adjust your hands, and settle in your new position to prepare for the jerk.
Adjusting between the clean and jerk rack positionsExperiment
Sometimes a very small change will result in a large improvement in lift performance. Experiment with these positions until you find what precisely produces the best results for you.

I'd welcome any recommendations.
Sorry, I'm not clear on what your looking for recommendations for - grip with for the clean? If what you're doing works and seems to be the best you can do, keep doing it.
I have no problem with the front rack in the clean, and generally can jerk with a slightly wider than clean grip, but the elbows still have to be fairly high. Do you have any exercises or stretches to help with this? Sorry if this doesn't make sense.
Bar on the back with jerk grip like you're going to back squat it - lift your elbows forward and as high as possible, and push your shoulders forward as far as possible, keeping a full grip on the bar.
Loaded bar in squat rack. Take your jerk grip with full hand and partially squat under the bar to set your elbows/hands in the correct jerk rack position, then push with your legs to bring your shoulders up into the bar, trying to maintain the hand/elbow position as much as possible.
Greg Everett
Greg Everett
Alyssa Sulay